Holosun EPS Manual: A Comprehensive Guide (Updated 04/28/2026)
Welcome! This manual provides detailed instructions for the Holosun EPS, ensuring optimal performance and safe operation. Access downloadable resources at HOLOSUN® Downloads.
The Holosun EPS (Enhanced Performance Sight) represents a significant advancement in optic technology, offering unparalleled versatility for pistol and rifle applications. This manual serves as your comprehensive guide to understanding, installing, and maximizing the potential of your new sight.
Designed for both professional shooters and enthusiasts, the EPS boasts features like solar and auto-on/off functionality, multiple reticle options, and robust durability. Refer to HOLOSUN® Downloads for the latest updates and supplemental materials. Proper understanding of this manual is crucial for safe and effective use.
What is the Holosun EPS and its Applications?
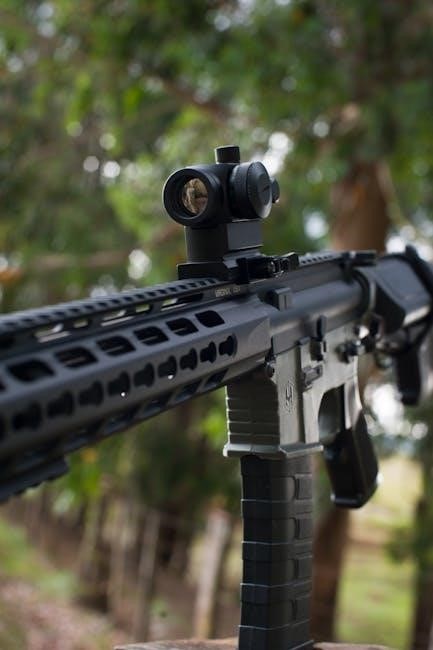
The Holosun EPS is a versatile, enclosed-emitter reflex sight designed to enhance shooting accuracy and speed. Its primary applications span across various shooting disciplines, including competitive shooting, tactical operations, and recreational target practice.
Suitable for both pistols and rifles, the EPS offers a wide field of view and clear optics. Explore additional resources and downloadable manuals at HOLOSUN® Downloads to fully understand its capabilities and potential uses.
Unboxing and Initial Inspection
Upon receiving your Holosun EPS, carefully inspect the packaging for any signs of damage during transit. Once opened, verify that all listed components are present. A thorough initial inspection ensures you have a fully functional product ready for mounting.
Refer to HOLOSUN® Downloads for a complete component checklist and detailed visual guides. Report any discrepancies or damage immediately to the retailer or Holosun support.
Components Included in the Package
The standard Holosun EPS package typically includes the EPS sight itself, a CR2032 battery, a rubber cover, a lens cloth for cleaning, and necessary mounting hardware. You should also find documentation, including a quick start guide and warranty information.
For a precise list tailored to your specific model, consult the HOLOSUN® Downloads section on the official Holosun website; Verify all items are present before proceeding.
Checking for Damage and Completeness
Upon receiving your Holosun EPS, carefully inspect the packaging for any signs of shipping damage. Once opened, examine the sight itself for scratches, cracks, or other physical defects.
Confirm all components listed in the package contents are present – sight, battery, cover, cloth, and hardware. Refer to HOLOSUN® Downloads for a detailed list. Report any discrepancies or damage immediately to the retailer.
Mounting the Holosun EPS
Proper mounting is crucial for accuracy and reliable performance. The Holosun EPS is designed for compatibility with various platforms, including pistols and rifles utilizing standard mounting footprints.
Ensure a secure fit by using appropriate mounting hardware and following recommended torque specifications detailed in the HOLOSUN® Downloads section. A loose mount can shift during use, impacting zero and potentially causing damage.

Compatibility with Different Platforms (Pistols, Rifles)
The Holosun EPS exhibits broad platform compatibility, seamlessly integrating with both pistols and rifles. It’s designed to fit standard mounting footprints, including those found on Glock MOS, Smith & Wesson M&P, and various Picatinny/Weaver rails.
Refer to HOLOSUN® Downloads for specific adapter plates needed for certain firearms. Confirm proper fit and secure mounting before operation to ensure optimal performance and safety.
Proper Mounting Techniques and Torque Specifications
Securely mount the Holosun EPS using appropriate screws and, if necessary, adapter plates. Ensure the optic sits flush against the mounting surface. Crucially, adhere to the recommended torque specifications – typically 8-10 inch-pounds for screws – to prevent damage or loosening during use.
Consult HOLOSUN® Downloads for detailed diagrams and specific torque values related to your firearm platform. Regularly check screw tightness before each use.
Understanding the Controls
The Holosun EPS features intuitive controls for seamless operation. A multi-function button manages power, brightness, and mode selection. Explore Solar, Auto, and Manual settings for optimal visibility in varying conditions. Brightness adjustment allows customization, with a memory function retaining your preferred level.
Refer to HOLOSUN® Downloads for a comprehensive control scheme diagram and detailed explanations of each function.
Power Button and Modes (Solar, Auto, Manual)
The EPS utilizes a single, multi-functional button for power and mode control. Solar Mode operates with ambient light, extending battery life. Auto Mode adjusts brightness based on surrounding light levels. Manual Mode allows user-defined brightness settings.
Pressing the button cycles through modes. Consult HOLOSUN® Downloads for specific button press sequences and detailed mode descriptions.
Brightness Adjustment and Memory Function
Within Manual Mode, use the side buttons to adjust the reticle’s brightness across multiple levels. The EPS features a memory function, automatically recalling the last used brightness setting upon power-up. This ensures personalized visibility without repeated adjustments.
Refer to HOLOSUN® Downloads for a complete list of brightness levels and detailed instructions on utilizing the memory function effectively.
Dot/Reticle Selection and Adjustment
The Holosun EPS allows users to switch between different reticle styles – dot, circle-dot, and various custom options – to suit individual preferences and shooting scenarios. Precise adjustments for windage and elevation are easily made using the clearly marked adjustment screws.
Detailed guidance on reticle selection and adjustment procedures can be found within the resources available at HOLOSUN® Downloads.
Zeroing the Holosun EPS
Achieving accurate shots requires proper zeroing of your Holosun EPS. This process aligns the reticle with the point of impact, compensating for bullet drop and windage. Begin at a known distance, typically 25 or 50 yards, and adjust the windage and elevation screws incrementally.
For detailed zeroing procedures, consult the comprehensive guides available at HOLOSUN® Downloads, ensuring optimal accuracy.

Zeroing Procedure for Different Distances
Zeroing at multiple distances requires a tiered approach. Start with a close-range zero (e.g., 25 yards) for quick acquisition. Then, move to your primary engagement distance (e.g., 100 yards), adjusting for bullet drop. Utilize the Holosun EPS’s precise adjustments for windage and elevation.
Refer to HOLOSUN® Downloads for detailed charts and procedures tailored to various calibers and distances, maximizing accuracy.
Understanding Windage and Elevation Adjustments
The Holosun EPS features clearly marked adjustment dials for windage (horizontal) and elevation (vertical). Windage corrects for left/right bullet impact, while elevation adjusts for up/down. Adjustments are typically measured in MOA (Minutes of Angle).
Small adjustments yield significant changes at distance. Consult HOLOSUN® Downloads for detailed MOA charts and guidance on precise zeroing techniques for optimal accuracy.
Battery Replacement and Maintenance
Maintaining your Holosun EPS involves periodic battery checks and replacements. The EPS typically uses a CR2032 battery, though specific models may vary – confirm via HOLOSUN® Downloads.
Replace the battery when the low battery indicator appears, or approximately every 600-800 hours of continuous use. Proper cleaning with a microfiber cloth ensures optimal performance and longevity.

Battery Type and Replacement Frequency
The Holosun EPS predominantly utilizes a CR2032 3V lithium battery for power. Refer to HOLOSUN® Downloads for model-specific confirmations. Battery life is estimated between 600-800 hours on medium brightness settings.
Replacement frequency depends on usage; frequent use or high brightness necessitates more frequent changes. Always use a fresh, quality CR2032 battery for reliable operation.
Cleaning and Storage Recommendations
To maintain your Holosun EPS, use a soft, dry cloth to gently wipe the exterior. Avoid harsh chemicals or abrasive cleaners, which can damage the lens coating. For stubborn debris, lightly dampen the cloth with isopropyl alcohol.
When storing, keep the EPS in a dry, safe location, preferably in its original packaging. Protect it from extreme temperatures and direct sunlight. Consult HOLOSUN® Downloads for further guidance.

Troubleshooting Common Issues
Encountering problems with your Holosun EPS? First, verify battery installation and power settings. If the dot is dim, adjust brightness or check for obstructions. A non-responsive EPS may require a battery replacement or reset.
For parallax or alignment issues, re-zero the device. Detailed troubleshooting steps and FAQs are available at HOLOSUN® Downloads. Contact Holosun support for unresolved concerns.
Dot is Dim or Not Visible
If the Holosun EPS dot appears dim, first increase the brightness level using the control buttons. Ensure the auto-brightness function isn’t set too low. Check the battery; a weak battery significantly impacts dot visibility. Inspect the lens for dirt, debris, or coatings that could obstruct the light path.
Refer to HOLOSUN® Downloads for detailed diagrams and troubleshooting guides.
EPS Won’t Power On
If your Holosun EPS fails to power on, the most common cause is a depleted battery. Replace the battery with a fresh CR2032, ensuring correct polarity. Verify the battery compartment is clean and free of corrosion. Attempt a manual power-on by pressing and holding the power button for several seconds.
Consult HOLOSUN® Downloads for detailed troubleshooting steps and diagrams.
Parallax Issues and Correction
Parallax occurs when the aiming point shifts with head movement. The Holosun EPS is designed to minimize parallax, but slight shifts can occur. To correct, ensure proper eye relief and consistent head positioning behind the optic.
Practice maintaining a consistent cheek weld. Refer to HOLOSUN® Downloads for advanced techniques and further assistance with minimizing parallax for optimal accuracy.
Safety Precautions and Warnings
Important: Always treat every firearm as if it is loaded. Never point a firearm at anything you are not intending to shoot. Familiarize yourself with all safety rules before using the Holosun EPS.
Review comprehensive safety guidelines and resources available at HOLOSUN® Downloads. Proper handling and storage are crucial to prevent accidental injury or damage.
Laser Safety Information (if applicable)
Caution: Some Holosun EPS models may include integrated lasers. Never intentionally shine the laser beam into anyone’s eyes, as this could cause serious and permanent eye damage.
Always be mindful of laser beam direction during operation and training. Refer to HOLOSUN® Downloads for specific laser classification details and safety regulations pertaining to your EPS model.

General Handling and Storage Guidelines
Proper Care: Handle your Holosun EPS with care, avoiding drops or impacts. When not in use, store the EPS in a protective case, away from extreme temperatures, humidity, and direct sunlight.

Regularly consult HOLOSUN® Downloads for updated care instructions. Cleaning should be performed with a soft, dry cloth. Avoid using harsh chemicals or solvents that could damage the finish or internal components.
Advanced Features and Settings
Unlock Potential: The Holosun EPS boasts innovative features like Shake Awake technology, instantly activating the reticle upon movement for extended battery life. Explore the Last Known Position (LKP) functionality, which recalls your previously saved zero setting.
Detailed explanations and customization options are available through HOLOSUN® Downloads; Mastering these settings enhances precision and responsiveness.
Shake Awake Technology Explained
Conserve Power: Holosun’s Shake Awake feature intelligently manages battery consumption. The EPS remains dormant until motion is detected, instantly activating the reticle. This extends operational life significantly, reducing the need for frequent battery changes.
Find detailed setup instructions and troubleshooting tips regarding Shake Awake within the comprehensive resources available at HOLOSUN® Downloads.
Last Known Position (LKP) Functionality
Rapid Re-acquisition: The Holosun EPS’s Last Known Position (LKP) feature automatically saves the sight’s previous location. Upon reactivation, the reticle swiftly returns to this stored position, minimizing re-zeroing time and enhancing target re-engagement speed.
Explore detailed explanations and configuration options for LKP within the official documentation found at HOLOSUN® Downloads.
Holosun EPS Specifications
Detailed Overview: The Holosun EPS boasts robust specifications designed for demanding applications. Key features include a compact footprint, durable construction, and extended battery life. For precise dimensions, weight, and environmental resistance data, consult the official specifications sheet.
Download the complete technical specifications document from HOLOSUN® Downloads to ensure compatibility and optimal performance.

Technical Specifications (Dimensions, Weight, Battery Life)
Precise Measurements: The Holosun EPS measures 2.05” x 1.65” x 1.18” and weighs a mere 1.4oz (without battery). Battery life varies based on usage, offering up to 20,000 hours on a CR2032 battery.
Find the most current and comprehensive specifications, including detailed charts, by downloading the official data sheet from HOLOSUN® Downloads.
Environmental Resistance and Durability
Built to Last: The Holosun EPS boasts robust durability, withstanding shock and recoil from various firearms. It’s submersible up to 1 meter and operates within temperatures ranging from -20°C to 60°C (-4°F to 140°F).
For detailed testing data and warranty information regarding environmental performance, please refer to the official documentation available at HOLOSUN® Downloads.